Importance of Audio in Videography
In the world of videography, audio plays a vital role in creating captivating and immersive experiences for viewers. While visuals are crucial, neglecting audio can significantly impact the overall quality of video production. Clear and engaging sound enhances the storytelling, evokes emotions, and ensures that the message is effectively communicated to the audience.
This article delves into the essential rules and techniques for capturing clear and engaging sound in videography. From understanding microphone types and placement to recording tips and post-production enhancements, we will explore the key aspects of audio that contribute to high-quality videography. By following these audio rules, you can elevate your videos to new heights and provide a truly immersive viewing experience.
Setting the Foundation for Capturing Clear and Engaging Sound
Before diving into specific techniques, it’s important to establish a strong foundation for capturing audio in videography. This includes understanding the basic principles of audio, familiarizing yourself with different microphone types, and knowing the significance of proper microphone positioning. By laying this groundwork, you’ll be better equipped to apply the subsequent audio rules effectively and create videos with outstanding sound quality.
Understanding the Basics of Audio in Videography
Key Audio Concepts
To capture clear and engaging sound in videography, it’s important to understand key audio concepts. Frequency refers to the pitch or tone of a sound, while amplitude represents the volume or intensity. Dynamics refer to the range between the quietest and loudest parts of an audio recording. By grasping these concepts, you can make informed decisions regarding audio recording and post-production adjustments to achieve optimal sound quality.
Types of Microphones and Their Uses in Videography
Microphones are essential tools for capturing sound in videography and understanding different microphone types is crucial. Shotgun microphones are highly directional and ideal for picking up sound from a specific subject or location. Lavalier microphones are small and clip-on, commonly used for capturing dialogue or interviews. Handheld microphones offer versatility and are often used in interviews or live performances. Each microphone type has its advantages and specific applications, so choosing the right microphone for the job is crucial to ensure clear and engaging audio in your videos.
Audio Recording Equipment and Accessories
In addition to microphones, audio recording equipment and accessories play a significant role in capturing high-quality sound. This includes audio recorders, which are devices used to capture and store audio recordings. They range from portable recorders to professional-grade systems. Other essential accessories include microphone stands, shock mounts, windscreens, and cables. Understanding the purpose and proper usage of these equipment and accessories is essential to ensure optimal audio recording quality.
By familiarizing yourself with these basics of audio in videography, you’ll have a solid foundation to move forward and apply the audio rules effectively. Clear comprehension of audio concepts, microphone types, and recording equipment will empower you to make informed decisions and capture superior sound quality in your videography projects.
Choosing the Right Microphone for the Job
Differentiating Between Condenser, Shotgun, Lavalier, & Handheld Microphones
Condenser, shotgun, lavalier, and handheld microphones are all types of microphones commonly used in various audio recording and broadcasting applications. Each type has its own characteristics and is suited for different purposes. Here’s a brief overview of these microphones:
1. Condenser Microphones
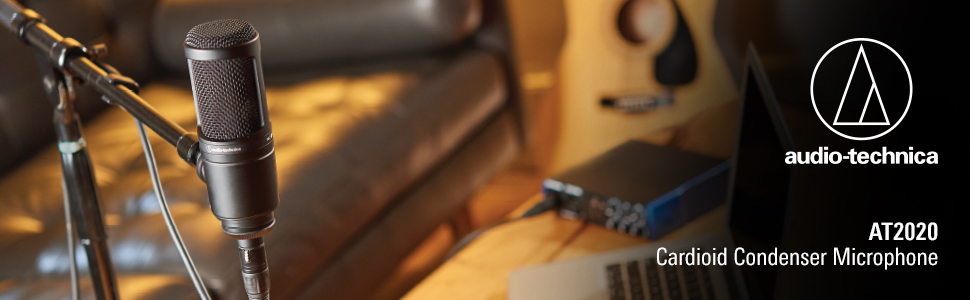
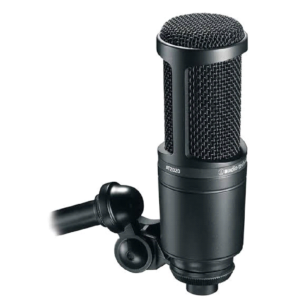
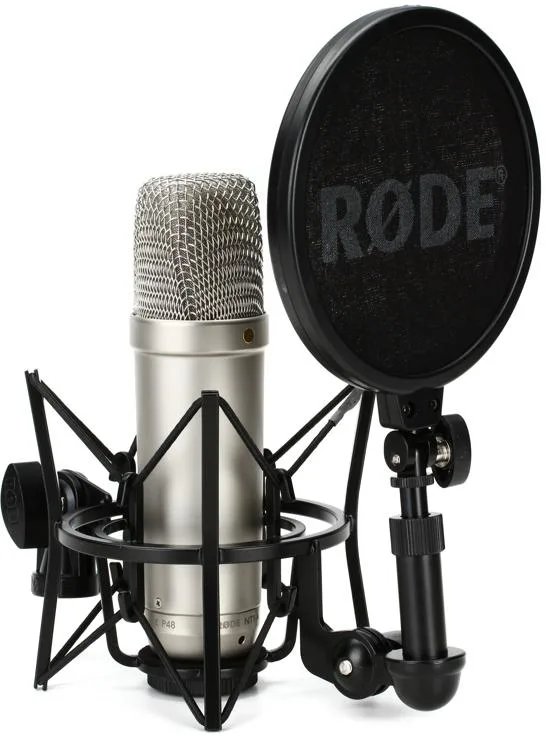
Condenser microphones are highly sensitive and offer a wide frequency response, making them suitable for capturing vocals and acoustic instruments with great detail. They require a power source, either through batteries or phantom power provided by an audio interface or mixer. Condenser microphones are commonly used in studio recordings, podcasting, and vocal performances.
There are two primary types of condenser microphones: small-diaphragm and large-diaphragm.
(Source: Hollyland)
Small-diaphragm condenser microphones are commonly used for recording instruments and are also suitable for capturing vocals and acoustic guitars. It provide a transparent and precise sound reproduction. These microphones are known for their realistic audio capture, making them suitable for any recording where authenticity is desired.
(Source: Sweetwater)
In contrast, large-diaphragm condenser microphones are well-suited for studio recordings and deliver superior sound quality compared to small-diaphragm counterparts. It blurs the line between microphone and instrument. Their purpose is to enhance the size, beauty, and captivating nature of the sound source, evoking a nostalgic “record-like” sensation. These microphones are considered the romantic choice, perfect for highlighting vocals and lead instruments.
2. Shotgun Microphones
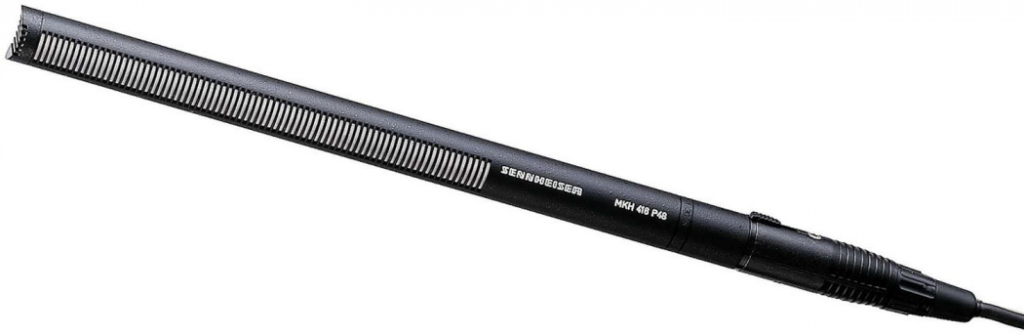
Sennheiser MKH416
(Source: Foto Erhardt)
Shotgun microphones have a long, narrow pickup pattern, which enables them to capture sound from a specific direction while rejecting background noise. They are commonly used in film and television production, on-location interviews, and outdoor recording, where the microphone needs to focus on a specific source while minimizing surrounding noise.
3. Lavalier Microphones
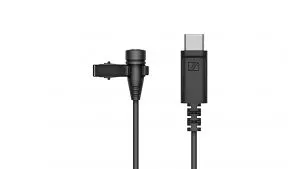
(Source: SoundGuys)
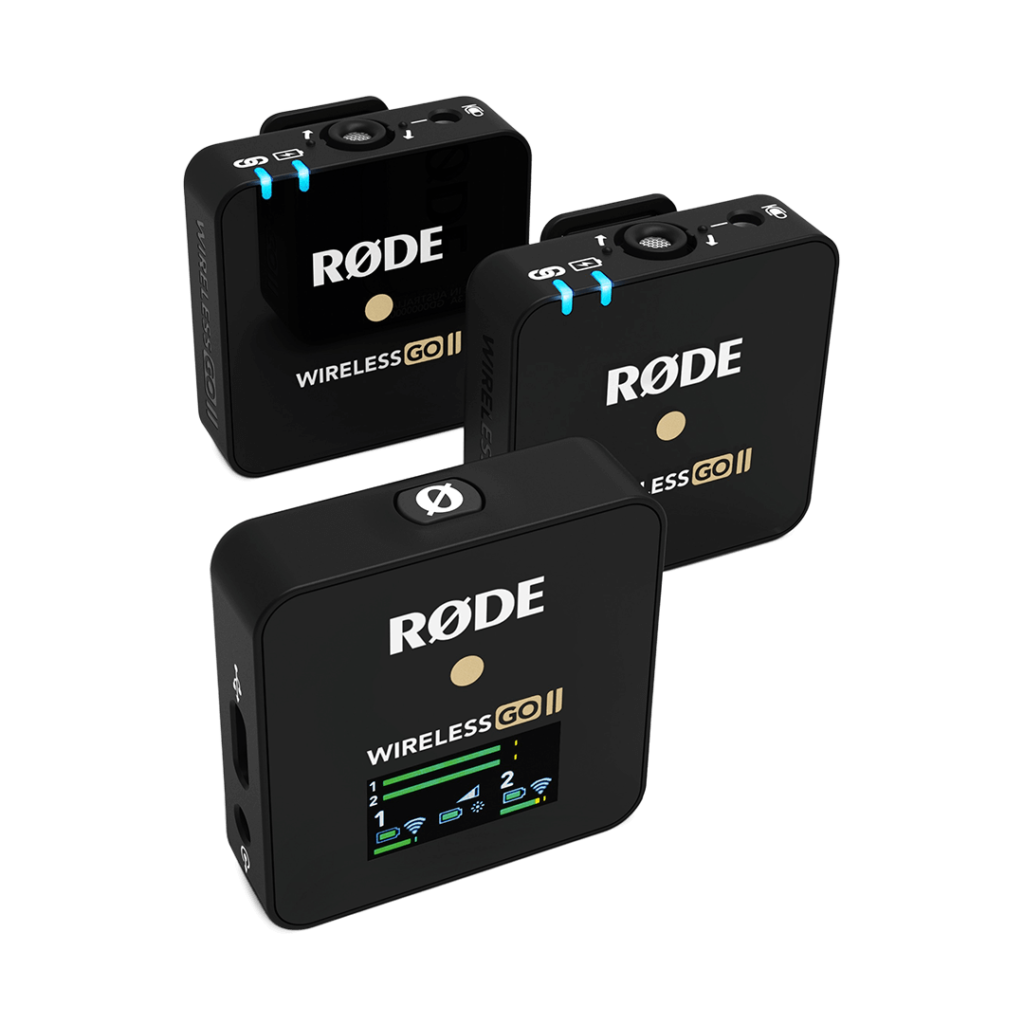
(Source: Rode.com)
Lavalier microphones, also known as lapel microphones, are small and discreet microphones that can be clipped onto clothing, typically close to the speaker’s mouth. They offer hands-free operation and are commonly used in interviews, presentations, stage performances, and video production. Lavalier microphones are particularly useful when mobility and flexibility are required, allowing the speaker to move freely while maintaining consistent audio quality.
4. Handheld Microphones:

(Source: Expandore)

(Source: Sweelee)
Handheld microphones are designed to be held by hand during use and are often used in live performances, public speaking engagements, and recording vocals. They are generally robust and easy to handle, offering good sound quality and versatility. Handheld microphones are available in various styles, including dynamic and condenser options, and are widely used in stage performances and broadcasting.
It’s important to note that these microphone types can have different variations and applications within their categories. The specific model and features of a microphone will also influence its performance.
Types of Microphone Polar Patterns
Besides that, understanding different microphone polar patterns is important for selecting the most appropriate microphone for capturing clear and engaging sound when recording. Each polar pattern has its advantages and limitations, and choosing the right one can greatly impact the quality and clarity of the recorded audio. There are several types of microphone polar patterns, each with its own characteristics and applications. Here are some common types:
a. Cardioid
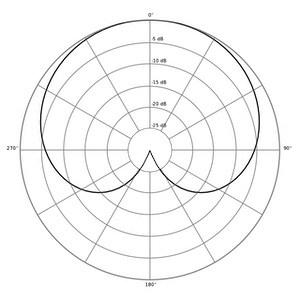
(Source: MyNewMicrophone)
This polar pattern is heart-shaped, with the microphone being most sensitive to sounds coming from the front and less sensitive to sounds from the sides and rear. Cardioid microphones are commonly used for capturing single sound sources, such as vocals or instruments while minimizing background noise.
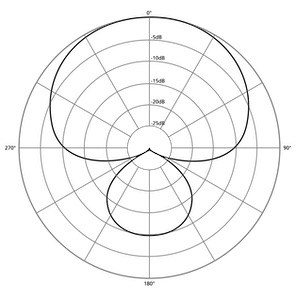
b. Subcardioid
(Source: Wikipedia)
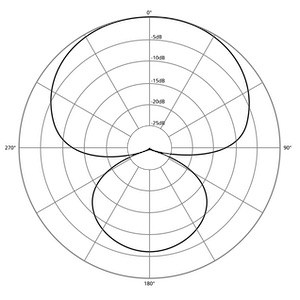
The subcardioid pattern is a modified version of the cardioid pattern, incorporating elements of both cardioid and omnidirectional patterns. It strikes a balance between the two, making it ideal for capturing sound sources that are dynamic and move around while staying primarily in front of the microphone.
c. Omnidirectional
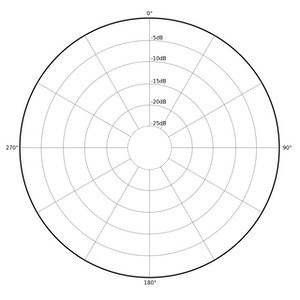
(Source: MyNewMicrophone)
An omnidirectional polar pattern captures the sound equally from all directions. It is ideal for capturing ambient or room sounds, as well as group recordings. Omnidirectional microphones are not as effective in reducing background noise or feedback compared to other polar patterns.
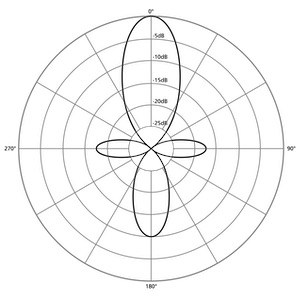
d. Figure-8 (Bidirectional)
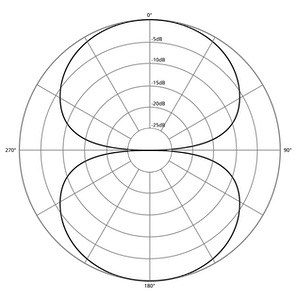
(Source: MyNewMicrophone)
The figure-8 polar pattern picks up sound from the front and rear of the microphone while rejecting sound from the sides. This pattern is useful for capturing sound from two opposite directions, such as in interviews or duets.
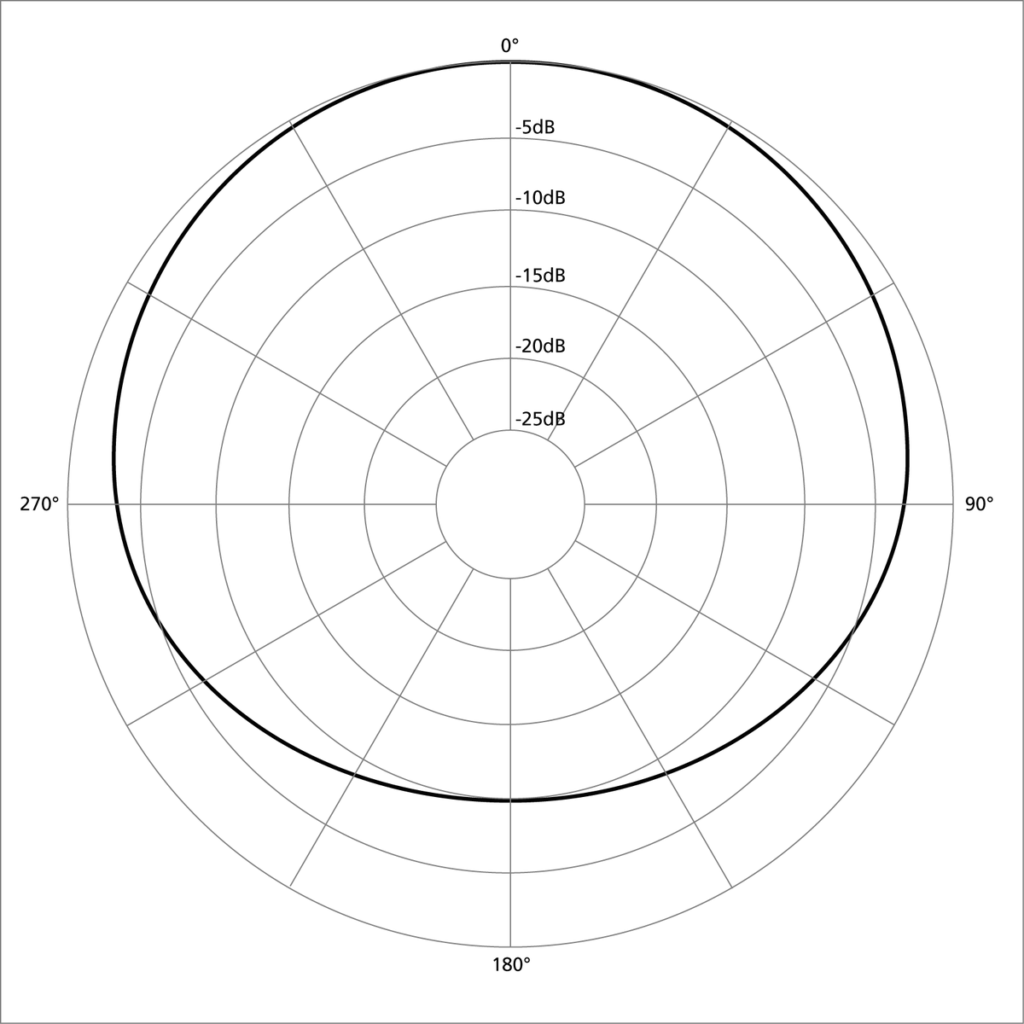
e. Supercardioid / Hypercardioid
(Source: MyNewMicrophone)
(Source: MyNewMicrophone)
These polar patterns are narrower versions of the cardioid pattern, with a more focused pickup area and greater sensitivity to sounds from the front. They offer increased directionality and are commonly used in live performances or when isolating sound sources in noisy environments.
f. Shotgun
(Source: MyNewMicrophone)
Shotgun microphones have a highly directional polar pattern, capturing sound from a very narrow-angle in front of the microphone. They are commonly used in film, TV, and broadcast applications to pick up sound from a distance while rejecting unwanted noise.
Matching Microphone Types with Specific Shooting Scenarios
Different shooting scenarios require different microphone types to capture optimal audio. For example, in outdoor environments with distant subjects, a shotgun microphone with a narrow pickup pattern can help focus on the desired sound source while reducing ambient noise. In situations where mobility is crucial, lavalier microphones provide flexibility and hands-free operation. Handheld microphones are often used in live events or situations where the microphone needs to be visible and easily accessible. By considering the shooting scenario and the desired audio outcome, you can match the microphone type to effectively capture clear and engaging sound.
Tips for Selecting the Appropriate Microphone for Different Environments
When choosing a microphone for a specific environment, there are a few factors to consider. For outdoor shoots, wind noise can be a challenge, so selecting a shotgun microphone with a built-in windscreen or using an external windscreen can help mitigate this issue. In indoor settings, echo and reverberation can affect audio quality, so choosing a microphone with a tighter pickup pattern or using acoustic treatments in the space can improve sound clarity. Additionally, considering the distance between the microphone and the sound source is crucial to ensure optimal audio levels and minimize background noise.
It’s also important to consider the equipment compatibility, such as the microphone’s connection type (e.g., XLR, TRS, USB), and ensure it is compatible with your recording device. Testing and experimenting with different microphones in various environments can help you identify the best microphone for each shooting scenario.
By understanding the differences between microphone types, matching them with specific shooting scenarios, and considering the environmental factors, you can confidently select the appropriate microphone to capture clear and engaging sound in your videography projects.
Positioning and Placement of Microphones

Techniques for Optimal Microphone Placement on Subjects & Objects
To capture clear and engaging audio, mastering the art of microphone placement is crucial. Here are some techniques for optimal microphone placement:
For Condenser Microphone:
- Place the microphone at an appropriate distance from the subject or object.
- For vocals or speech, aim for a distance of around 6 to 12 inches (15 to 30 cm) from the speaker’s mouth.
- For instruments, experiment with different distances to capture the desired sound balance.
- Position the microphone at a slight angle to minimize plosive sounds and sibilance.
- Experiment with angling the microphone off-axis to find the best position for capturing clear and balanced audio.
For Shotgun Microphones:
- Position the microphone above or slightly in front of the subject, pointing towards their mouth or the sound source.
- Maintain an appropriate distance to achieve a good balance between the subject’s voice and ambient noise.
- Adjust the angle and proximity of the microphone to capture the desired sound characteristics and minimize off-axis noise.
For Lavalier Microphones:
- Attach the microphone close to the subject’s chest or collar, ensuring it is positioned slightly below the mouth.
- Use mic clips or adhesive mounts to secure the microphone while maintaining freedom of movement.
- Orient the microphone capsule towards the sound source for optimal sound capture.
For Handheld microphones:
- Instruct speakers to hold the microphone at a consistent distance from their mouth, usually around 6-12 inches (15-30 cm).
- Encourage speakers to speak into the top or side of the microphone to capture the best sound quality.
- Ensure a firm grip on the microphone to minimize handling noise while allowing for comfortable handling.
Addressing Common Challenges & Solutions for Microphone Positioning
Microphone positioning can present challenges that affect sound quality. Here are some common challenges and their solutions:
Handling Noise Issues:
Advise speakers to handle the microphone gently and use shock mounts or foam covers to reduce handling noise caused by vibrations or impacts. These precautions help maintain clean and clear audio recordings.
Wind Noise:
To reduce wind noise during outdoor recordings, attach a windscreen or furry windshield (deadcat) to the microphone. Position the microphone to minimize direct exposure to the wind. These measures effectively minimize unwanted wind noise and improve the quality of your audio recordings.
Proximity Effect:
Be mindful of the proximity effect when placing the microphone close to the sound source. Adjust the position to avoid excessive bass response, which can result in a boomy or muffled sound. Striking the right balance ensures a natural and clear audio representation.
Tips For Reducing Unwanted Background Noise & Improving Sound Clarity
To ensure high-quality audio with minimal background noise, consider the following tips:
Choose A Suitable Recording Location:
When it comes to recording audio, choosing a suitable location is paramount. Aim for a quiet and controlled environment to minimize background noise. Avoid areas with constant distractions or sources of noise interference, as they can adversely affect the quality of your recordings.
Use Directional Microphones:
Using directional microphones is another effective strategy. Opt for shotgun or super cardioid microphones that are designed to focus on the primary sound source while reducing background noise. Position the microphone in such a way that it faces the desired sound while rejecting unwanted noise from other directions. This helps capture clear and isolated audio, enhancing the overall quality of your recordings.
Monitor Audio Levels & Adjust Gain:
Monitoring audio levels and adjusting the gain is crucial for maintaining optimal audio quality. Regularly monitor the audio levels during recording to ensure they are neither too low nor too high. Adjust the microphone’s gain or sensitivity settings based on the sound source and the recording environment to achieve the best balance. This ensures that your recordings have sufficient volume without distortion or clipping.
Employ Noise Reduction Techniques:
In post-production, employing noise reduction techniques can further enhance your audio. Utilize noise reduction tools or plugins to reduce background noise while preserving the clarity of the desired audio. However, exercise caution not to overuse noise reduction, as it can introduce artifacts and negatively impact the overall quality of the audio. Striking the right balance is essential.
By applying these techniques and solutions, you can optimize microphone placement, overcome common challenges, and capture clear, engaging audio while minimizing unwanted background noise.
Audio Recording Tips and Best Practices
Setting Audio Levels Correctly to Avoid Distortion & Clipping
1. Use Headphones
Using headphones during recording is crucial for monitoring the audio levels in real time. By wearing headphones, you can ensure that the audio signal is clear and free from distortion or clipping. This allows you to make immediate adjustments if any issues are detected, ensuring that the recorded audio remains pristine and of high quality.
2. Adjust Gain Settings
Another important aspect is to adjust the microphone’s gain or input level appropriately. Set the gain at a level that captures the desired sound levels without overloading the microphone. Avoid setting the gain too high, as it can result in distorted or clipped audio. By finding the right balance and setting the gain at an optimal level, you can capture the audio accurately and avoid any unwanted artifacts.
3. Perform Test Recordings
Performing test recordings before the actual shoot is great practice. This allows you to fine-tune the audio levels and make necessary adjustments based on the loudest sound source. By conducting these test recordings, you can identify and address any potential issues with the audio levels, ensuring that the final recordings are clean and balanced. Adjusting the gain settings based on the loudest sound source helps prevent clipping, ensuring that the audio remains clear and distortion-free.
Proper Usage of Windshields & Pop Filters to Minimize Unwanted Noise
1. Windshields for Outdoor Recordings
Windshields are essential for outdoor recordings to minimize wind noise. Attach a foam windscreen or a furry windshield, commonly known as a deadcat, to the microphone. These accessories effectively reduce the impact of wind gusts on the audio. Ensure that the windshield completely covers the microphone to provide optimal protection against wind noise.
2. Pop Filters for Vocal Recordings:
When it comes to vocal recordings, pop filters play a crucial role in achieving clean and clear audio. Position a pop filter or a mesh screen in front of the microphone to prevent plosive sounds caused by bursts of air, such as “p” or “b” sounds. By placing the pop filter a few inches away from the microphone, you can maintain a consistent audio pickup while effectively eliminating unwanted plosives. This ensures that vocals are captured accurately without any distracting bursts of air.
By employing windshields for outdoor recordings and pop filters for vocal recordings, you can significantly improve the audio quality of your recordings. These accessories help reduce wind noise and eliminate plosive sounds, resulting in more professional and enjoyable audio content.
Techniques for Capturing Room Ambience & Natural Sound Effects
1. Room Ambience
To capture the natural room ambience, avoid close-miking the sound source. Instead, position the microphone at a moderate distance to blend the direct sound with the room’s natural reverberation. This allows for a more immersive and authentic audio experience.
2. Natural Sound Effects
Incorporating natural sound effects enhances the audio experience. Listen carefully to the environment for unique sounds like birds, waves, or footsteps. Experiment with microphone placement and distance to capture these sounds effectively. Maintain a balance with the primary audio source for a clear mix. Adding natural sound effects enriches the video, immersing viewers and enhancing their experience.
Maintaining Consistent Audio Quality Throughout the Shooting Process
1. Monitor Audio Levels Continuously
Assigning a dedicated person to monitor audio levels during the shoot is crucial for consistent quality. Regularly check the audio levels and make adjustments as needed to avoid issues like distortion or clipping. This attention to detail ensures a professional and engaging final product.
2. Minimize Handling Noise
Minimize handling noise by instructing careful handling of equipment and microphones. Use shock mounts or boom poles to reduce vibrations. This ensures clean and professional audio recordings.
3. Conduct Periodic Sound Checks
Conduct periodic sound checks to ensure consistent audio quality. Listen carefully for issues like distortion or background noise. Make adjustments to microphone placement and settings as needed. Regular sound checks maintain high-quality audio throughout the shooting process.
Dealing with Challenging Audio Environments
Handling Noisy / Acoustically Challenging Locations
When dealing with noisy or acoustically challenging locations, consider the following strategies:
1. Choose A Suitable Location
Scout locations in advance and prioritize quieter environments whenever possible. Avoid areas with excessive background noise, such as busy streets, construction sites, or loud machinery.
2. Use Directional Microphones
Utilize shotgun or super cardioid microphones to focus on the desired sound source while minimizing surrounding noise. Position the microphone as close as possible to the sound source for improved signal-to-noise ratio.
3. Adjust Microphone Placement
Experiment with microphone positioning to find the optimal spot that captures the desired sound while reducing unwanted noise. Be mindful of proximity to noisy sources and adjust accordingly.
Recording Audio in Outdoor Settings & Mitigating Wind Noise
When recording audio in outdoor settings where wind noise can be a challenge, consider these tips:
1. Use Wind Protection
Attach a foam windscreen or a furry windshield (deadcat) to the microphone. Ensure the wind protection completely covers the microphone to effectively block wind gusts.
2. Position the Microphone Strategically
Place the microphone at an angle that minimizes direct exposure to the wind. Utilize natural windbreaks like trees, buildings, or structures to shield the microphone from wind gusts.
3. Monitor & Adjust for Wind Noise
Wear headphones during outdoor recordings to actively monitor and make adjustments to minimize wind noise. Modify microphone positioning or add additional wind protection as necessary.
Addressing Echo & Reverberation Issues in Indoor Environments
To tackle echo and reverberation issues in indoor environments, employ the following techniques:
1. Choose The Right Location
Select a room with good acoustics, preferably one with minimal echo or reverberation. Opt for rooms with carpeting, curtains, or soft furnishings that can help absorb sound reflections.
2. Add Acoustic Treatment
Use sound-absorbing materials like acoustic panels, baffles, or foam to minimize reflections and reverberation. Place panels strategically on walls, ceilings, or corners where sound reflections are prominent.
3. Adjust Microphone Placement
Experiment with microphone placement to find the sweet spot that minimizes echo and captures the desired sound. Position the microphone closer to the sound source to reduce the influence of room acoustics.
Syncing Audio with Video
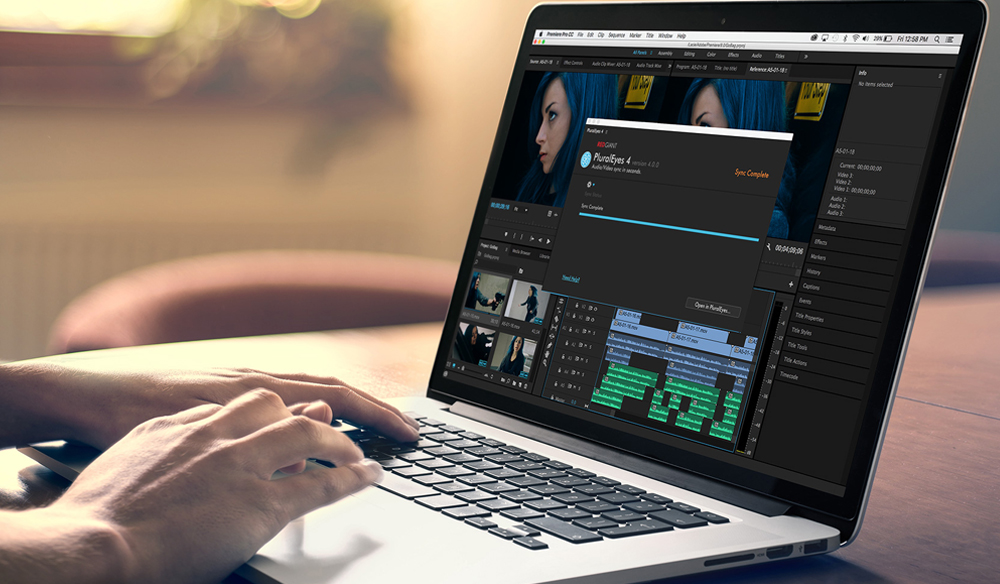
Importance of Syncing Audio & Video in Post-Production
Syncing audio and video are crucial in post-production as it ensures that the audio and visual elements are perfectly aligned. Accurate synchronization enhances the overall viewer experience, creating a seamless and professional final product. Proper audio-video sync is vital for dialogue clarity, lip-sync accuracy, and maintaining the integrity of the storytelling. It helps create a natural and immersive viewing experience where the audio and visuals are in perfect harmony.
Techniques for Achieving Accurate Synchronization
To achieve accurate synchronization between audio and video, consider the following techniques:
1. Clapperboard / Slate
Use a clapperboard or slate at the beginning of each take. The visual and audio cues captured by the clapperboard provide reference points for aligning the audio and video tracks during editing.
2. Audio Waveform Matching
Utilize the waveform representation of the audio in editing software. By aligning the distinctive peaks and patterns in the audio waveform with corresponding visual cues, you can achieve precise synchronization.
3. Manual Adjustment
Fine-tune the synchronization manually by adjusting the audio or video track frame by frame. This method allows for the precise alignment of audio events with specific visual cues.
Tools and Software for Seamless Audio-Video Syncing
Several tools and software options are available to facilitate seamless audio-video syncing:
1. Non-Linear Editing Software
Popular editing software such as Adobe Premiere Pro, Final Cut Pro, or DaVinci Resolve provides tools and features specifically designed for audio-video syncing. These tools offer precise control over synchronization, allowing you to align audio and video tracks accurately.
2. Timecode-based Syncing
Timecode is a synchronization reference embedded in audio and video files. Using software that supports timecode, you can sync audio and video tracks automatically based on their respective timecode values.
3. Audio Syncing Plugins
Some plugins and software tools are designed specifically for automatic audio syncing. They analyze the audio and video tracks and align them based on common audio cues or patterns, streamlining the syncing process.
Editing and Enhancing Audio in Post-Production
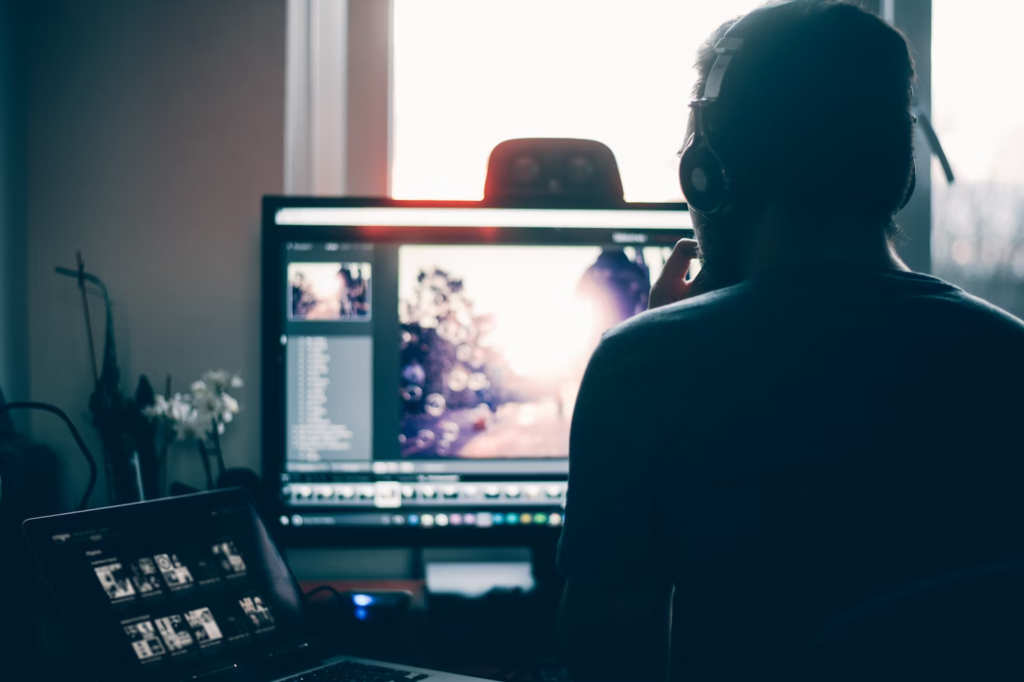
Basic Audio Editing Techniques for Removing Unwanted Noise and Improving Clarity
In post-production, audio editing plays a crucial role in refining the quality and clarity of the recorded audio. Some basic techniques for removing unwanted noise and improving clarity include:
1. Noise Reduction
Utilize noise reduction tools or plugins to eliminate background noise such as hiss, hum, or room ambiance. Identify the noise profile and apply the appropriate settings to reduce or remove the unwanted noise.
2. De-essing
Address sibilance or harsh “s” and “sh” sounds by using de-essing tools. These tools reduce the excessive high-frequency content without affecting the overall clarity of the audio.
3. Vocal Editing
Edit and clean up vocal recordings by removing breath sounds, mouth clicks, or any other extraneous noises. Make precise cuts or use tools like spectral editing to remove specific elements while preserving the natural sound.
Tips for Equalizing, Compressing, and Mastering Audio Tracks
Equalization, compression, and mastering techniques are essential for achieving a balanced and polished audio mix:
1. Equalization (EQ)
Use EQ to adjust the frequency balance of individual audio tracks or the overall mix. Cut or boost specific frequencies to enhance clarity, reduce muddiness, or bring out certain elements in the audio.
2. Compression
Apply compression to control the dynamic range of audio, ensuring that softer sounds are audible while louder sounds remain controlled. Compression helps balance the overall audio levels and enhances the perceived clarity.
3. Mastering
Mastering is the final stage of audio processing, where the entire mix is polished for optimal playback across different platforms. Use mastering tools to fine-tune the overall audio levels, stereo width, and frequency balance, ensuring a cohesive and professional sound.
Adding & Adjusting Sound Effects & Music to Enhance the Overall Audio Experience
Sound effects and music are powerful tools for enhancing the overall audio experience and creating a more immersive and engaging production. Consider the following tips when incorporating sound effects and music:
1. Sound Effects
Carefully select and add sound effects that complement the visuals and enhance the storytelling. Ensure the sound effects are well-timed and appropriately balanced with the dialogue and other audio elements.
2. Music
Choose appropriate music tracks that align with the mood, genre, or atmosphere of the production. Adjust the volume levels and apply fades or transitions to smoothly blend the music with the audio and maintain a consistent mix.
3. Mixing Levels
Pay attention to the relative levels of sound effects, dialogue, and music during the mixing process. Ensure that each element is audible and well-balanced, avoiding any overpowering or competing audio elements.
By employing these editing techniques, applying equalization and compression, and thoughtfully incorporating sound effects and music, you can elevate the quality and impact of your audio in post-production. The end result will be a professionally edited audio mix that enhances the overall audio experience and captivates your audience.
Tips for Conducting Interviews and Capturing Dialogue
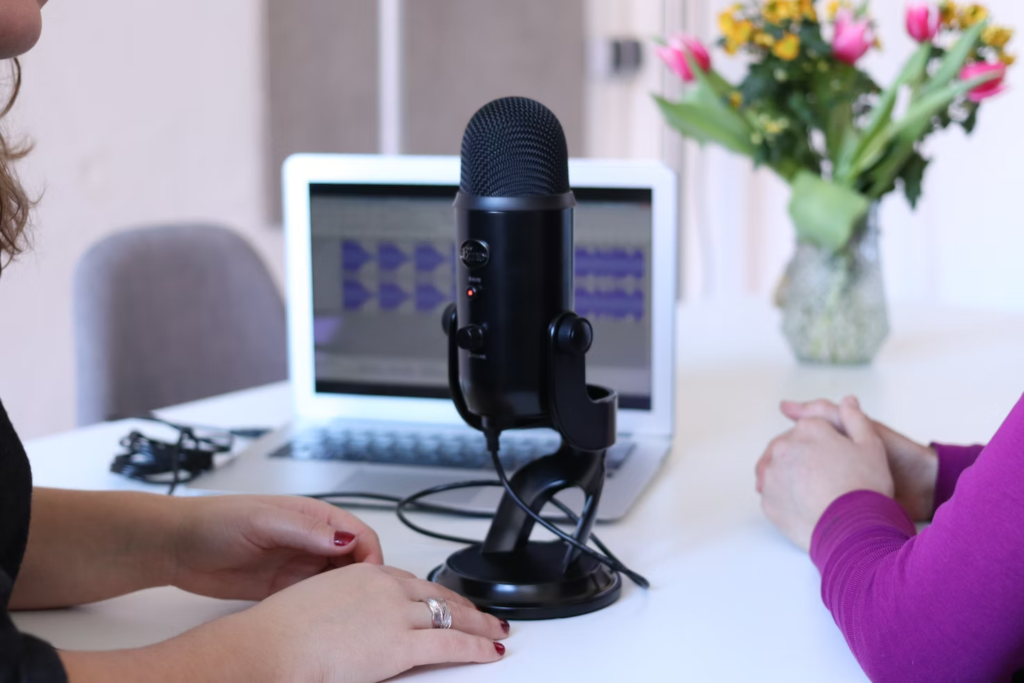
Techniques for Recording Clear & Natural-Sounding Interviews
Recording clear and natural-sounding interviews is crucial for capturing engaging and authentic dialogue. Consider the following techniques:
1. Use A High-Quality Microphone
Invest in a good-quality microphone that is suitable for capturing interviews. A dynamic or condenser microphone with a cardioid or omnidirectional pickup pattern is often preferred for interview settings.
2. Position the Microphone Appropriately
Position the microphone close to the interviewee while maintaining a comfortable distance to capture clear audio. Aim for consistent sound levels and minimize background noise.
3. Conduct Pre-Interview Sound Checks
Before beginning the interview, conduct a sound check to ensure proper microphone placement, appropriate audio levels, and clarity. Adjust as needed to achieve optimal audio quality.
Managing Multiple Audio Sources During Interviews
Interviews may involve multiple audio sources, such as multiple microphones or external audio recorders. To effectively manage multiple audio sources:
1. Sync the Audio Sources
Ensure that all audio sources are synchronized to maintain accurate timing during post-production. Use clapperboards or other sync markers to align the audio sources visually and audibly.
2. Monitor Audio Levels
Continuously monitor audio levels from each source during the interview. Adjust levels as necessary to maintain a balanced mix and prevent distortion or clipping.
3. Separate Audio Tracks
If using multiple microphones or recorders, record each source on separate tracks. This allows for greater control and flexibility during editing, mixing, and post-production.
Ensuring Proper Mic Placement for Capturing Dialogue Effectively
Proper microphone placement is essential for capturing dialogue effectively and ensuring clear and intelligible speech. Consider the following guidelines:
1. Position the Microphone Near the Interviewee’s Mouth
Place the microphone at an optimal distance, typically a few inches away from the interviewee’s mouth. This helps capture clear and direct sound while minimizing background noise.
2. Use A Windscreen / Pop Filter
Attach a windscreen or pop filter to the microphone to reduce plosive sounds (such as “p” and “b” sounds) and minimize wind noise or excessive breath sounds.
3. Consider the Interview Setting
Adapt the microphone placement based on the interview setting. For example, in noisy environments, position the microphone closer to the interviewee to prioritize their voice over ambient noise.
By employing these techniques, managing multiple audio sources, and ensuring proper microphone placement, you can conduct interviews and capture dialogue with clarity and authenticity. These tips will help you achieve high-quality audio recordings that enhance the overall interview experience and effectively convey the intended message.
Conclusion
Throughout this article, we have covered a range of key audio rules and tips to help you capture high-quality audio in your videography practice. We discussed techniques for optimal microphone placement, addressing challenges in different environments, setting audio levels correctly, mitigating unwanted noise, and enhancing audio in post-production. These guidelines provide a solid foundation for achieving clear and professional audio recordings.
It is crucial to apply these audio rules in your videography practice. While it’s easy to focus solely on visuals, neglecting audio can greatly diminish the overall impact of your videos. By implementing proper microphone techniques, monitoring audio levels, reducing unwanted noise, and utilizing post-production editing tools, you can elevate the quality of your videos and create a more immersive and engaging experience for your audience.
In conclusion, high-quality audio is of utmost importance in creating engaging videos. It enhances the viewer’s immersion, brings clarity to dialogue, and amplifies the impact of music and sound effects. By following the rules and tips discussed in this article, you can ensure that your audio recordings are clean, clear, and professional. Remember, well-captured audio can complement and enhance your visuals, resulting in a more captivating and memorable viewing experience. So, make audio a priority in your videography practice and unleash the true power of audiovisual storytelling.
If you like to learn more about the rules of videography, then check out our article about The Rule Of Thirds In Videography.